Login to your current or future Webcampus/Canvas course that you wish to rollover items TO.
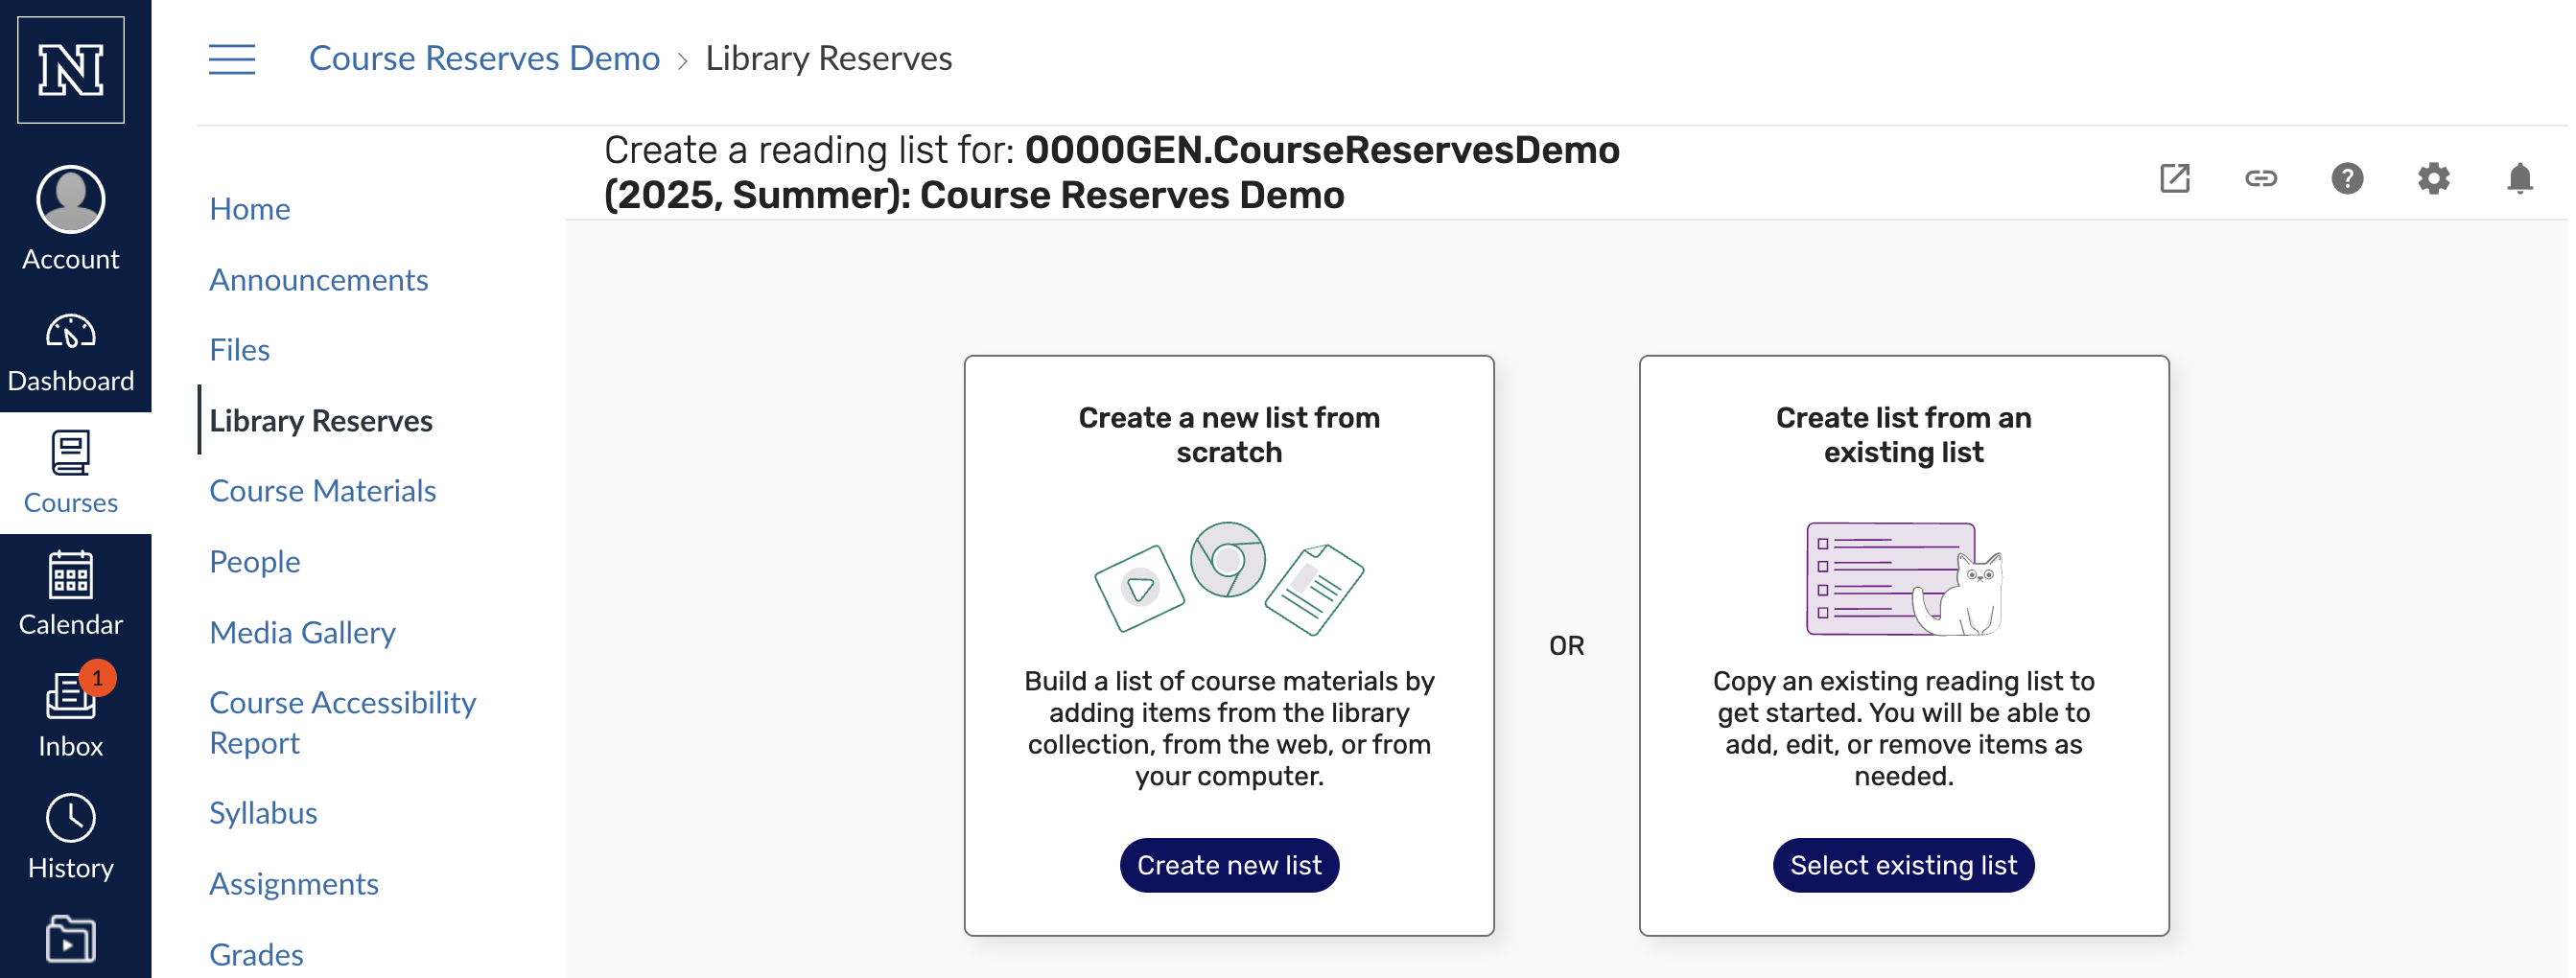
Click on "Library Reserves" on the left side menu.
Click on the “Select existing list” option.
Step 2
A list of your current and past courses should appear.
Click on “duplicate list” on desired course.
Step 3
The default settings should suffice for most all instances of duplicating a reading list.
Click Create list.
Step 4
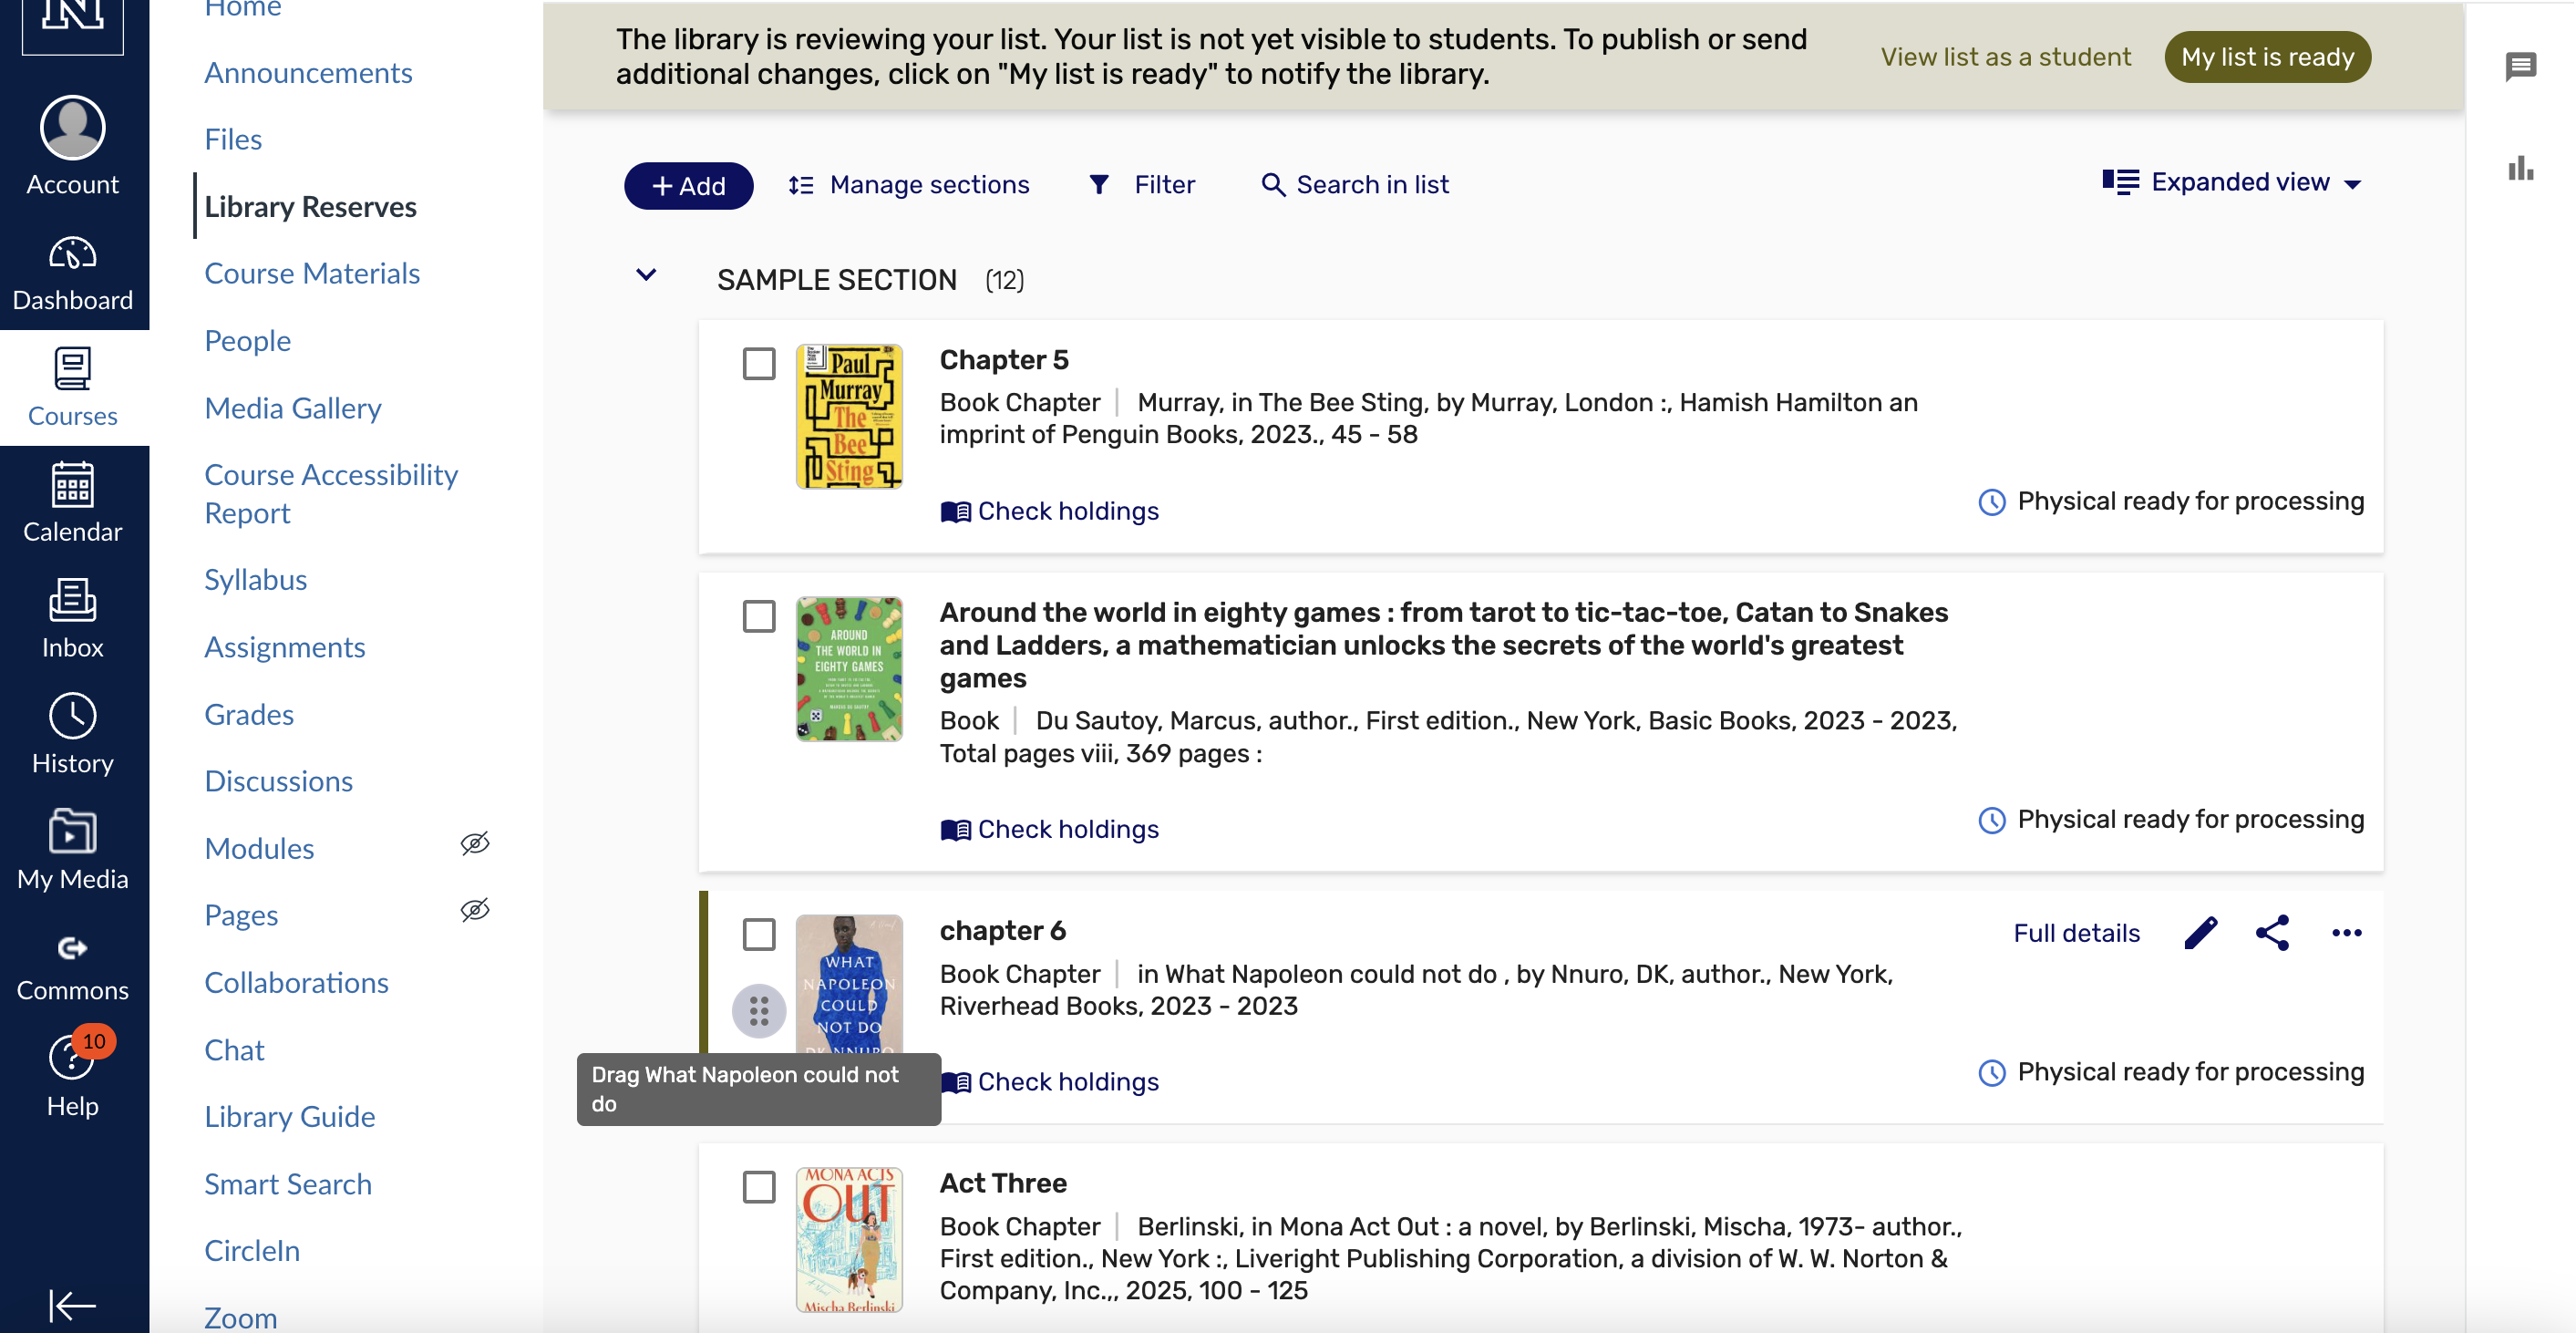
At this point, you may edit your reading list.
To edit, click the check box to the left of the item thumbnail.
Be sure to click “Save” at the upper right when editing is complete on each item.
To create a new section or add an additional item, click the “+Add” button.
To move items into sections, click the drag handle (the six dot pattern) at the left of the item thumbnail.
Once you have finished, be sure to click “My list is ready” in the upper right corner to send the reading list for review to the library.
You may add additional items throughout the semester to the reading list and they will be automatically sent to the library for review.
Step 5
You may also publish the reading list when you send it to the library, or at a later date, if you choose.
Publishing will allow your students to access the items as soon as they are reviewed by the library.
Be sure to publish only to “Course students”.
Both students and instructors can access reserves by clicking "Library Reserves” in Webcampus.
Of course, only instructors have editing capability of reserves reading lists.
Step 6
Note: You may edit the title of your rolled over reading list to match your course name by clicking the ellipsis (three dots) at the top of the reading list. Be sure to click “Save” when done.